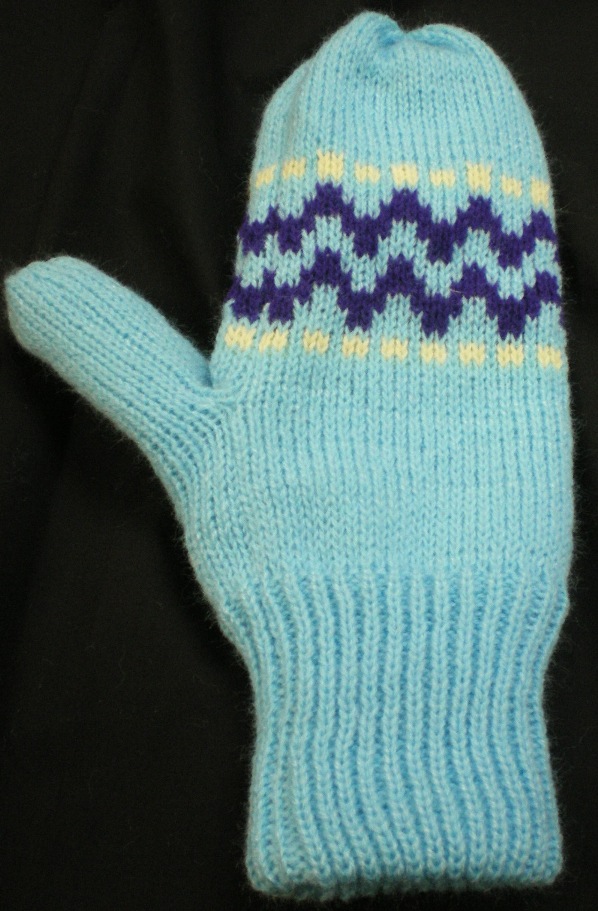
DOUBLE MITTENS by Roni Knutson
These are very nice fitting, double mittens, that pull apart for drying. More photos at the bottom of the page
showing how I sew them up.
(You can also find this pattern in Machine Knitting Monthly, March 2016)
|
|
|

| Pattern Rating | Easy for knitters with a little experience |
| Machine | This pattern is suitable for standard gauge machines with a ribber or without a ribber use mock rib. Made on a Studio 580 electronic. If you don't have a ribber; work ribs in mock rib. |
| Materials | Originally made in Newry 2/16 or Linwood 2/16 by Spinrite Yarns - approximately 3 ozs (85 grams) of main colour (two strands used throughout) or any other 2/16 used double. Since this yarn is no longer available, 4 ply yarn will give approximately the same result (tension should be matched). Small amounts of contrast are needed for fairisle and small amounts of crochet cotton. |
| Measurements | To fit medium sized woman's hand. (finished measurement from cuff bottom to fingertips is 10 in, 25.5 cm). Instructions are written for first size, larger size follows in brackets. If only one figure is given, it applies to both sizes. |
| Tension | 30 sts and 37 rows to 10 cm, (4 inches), measured over stocking stitch. Tension dial setting approx., 8. outer layer and 7.. for lining. When using 4 ply adjust tension to get desired sts and rows (approx., T6 for lining and T7 for outer part of mitten. |
| Note | If you are using an electronic together with a rib transfer carriage I would advise removing the
N1 cam. The pattern will automatically default to centre and it'll be one less thing you'll have to think about. This pattern was first published in The Carriage Trade, Issue #50, March 1994 |
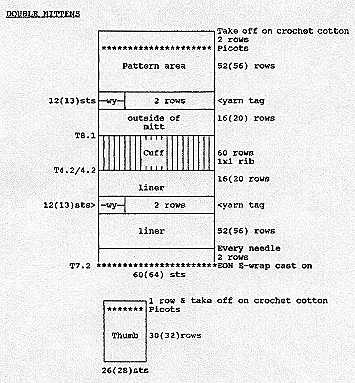
FIRST MITTEN
Lining
With carriage at right - bring 60 (64) needles out to hold (D position) and push back every other needle to non-working position (A position). Work e-wrap cast on across the remaining needles. Tension 7.., knit two rows. Bring empty needles into working position (B position) and make sure you have 30-0-30 (32-0-32). RC000 - knit 52 (56) rows. Carriage at right.
Thumb opening
Manually knit 2 rows of waste yarn on 12 (13) left edge needles and then place these needles in hold (D position). Put carriage to hold (Russell Levers to I) and knit 1 row to the left on working needles. Place marker on right side of work with waste yarn and then knit 1 row back to the right. Return carriage to regular knitting (Russell Levers to II) and continue to knit across all needles.
Lining continued
RC000 - knit 16 (20) rows
Cuff
Bring up ribber, set at P5. Transfer every other needle to the ribber. Add comb and weights. (If you do not have a ribber you can substitute mock rib.) T4../4.., RC000 - rib 60 rows. Transfer stitches back to the main bed. Remove comb and weights. (If you are using a RT1 Rib Transfer Carriage - and you have an electronic - move margins to left and remove N1 to avoid damage.) See note above.
Mitten exterior
Tension 8., RC000 - knit 16 (20) rows. Repeat thumb opening directions as shown above. RC000. You now have 52 (56) rows in which to knit a pattern.
Fairisle Notes
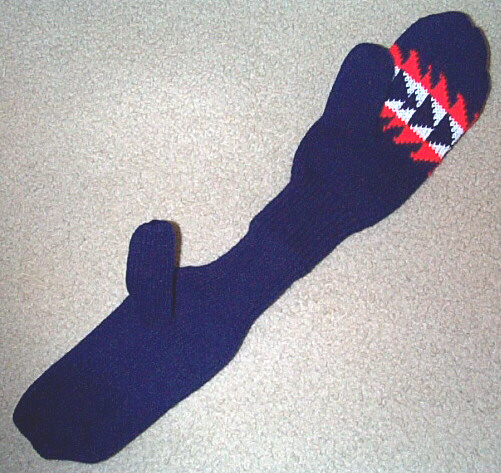
You should start your pattern after approximately 6 or 7 rows. If you do fairisle to the very tip of your mitten it will be stiffer and will not pull in as well - so I would advise a total of 30 rows in fairisle. Note also that patterns with long floats are not as suitable. These mitts pull apart for drying and can be difficult to put together if there are long floats on the inside. If you do use a pattern with long floats do not hook them up onto the needles as you knit, as the mitten will be too tight when finished. Instead when you take the mitten off the machine use another strand of yarn to loosely catch down the floats. It is much better to use a small pattern repeat - preferably a 6 stitch pattern repeat or less. After 52 (56) rows are complete, transfer every other stitch across the row to the needle beside it and put empty needles out of work. Knit 2 rows and using a bodkin, take off on a strong cord (I use remnants of crochet cotton).
SECOND MITTEN
Make other mitten to match with thumb opening on the opposite side. Add one row on the lining before you reach the thumb opening - this will put your carriage on the left side and the thumb stitches to be done in waste yarn will be on the right. Remember on mittens that your pattern should either face out <> or face in >< but both should not face the same way >>.
Thumbs
Bring forward 26 (28) needles, carefully unpick the waste yarn (one stitch at a time) from the stitches for the thumb and put on the needles (you could just cut down the centre of the two rows of scrap yarn but I found that I spent more time pulling out all the little bits and that it was quicker and easier to unpick one stitch from the scrap yarn at a time - besides you can use the little bits of scrap yarn on your next pair of mittens - they're just the right size). You will need to make 2 stitches in the centre of each 12 (13) to fill the 26 (28) needles. Try to do this so as to avoid a hole. (I usually pick up four strands, crossing two of them over each other). Place marker on opposite site to carriage with waste yarn. Match the tension (lining T7.., mitten exterior T8.) to whichever thumb you are doing and knit 30 (32) rows. Transfer every other stitch to needles next to it across the row and move empty needles out of work. Knit 1 row and take off on crochet cotton with a bodkin.
Complete other thumbs remembering to change the tension according to whether you are knitting the inside of the mitten or the outside.
TO MAKE UP - See photos below for additional help
Thread crochet cotton through cast on rows of mittens. Do not tie in a knot. Take mittens to your sewing machine and sew as follows (or sew by hand).
Sew thumbs first - use yarn marker as guide. Once they are sewn, tie crochet cotton in top of thumbs and cut off excess. Put right sides together and sew side seams of mittens matching patterns and ribbing - moving thumbs out of way and just catching edges (See photos below). Remove marking yarn. Tie crochet cotton at the top of the outside (fairisle bit) of the mitten (whilst right sides are still together) and cut off excess. Turn mitten right side out - tie crochet cotton at top of lining - use a bodkin or crochet hook to take through to the wrong side. Push lining into mitten and it's done.
Remember - Wrong side of work facing you:-
Thumb opening on right - RH mitten.
Thumb opening on left - LH mitten.
|
|
|
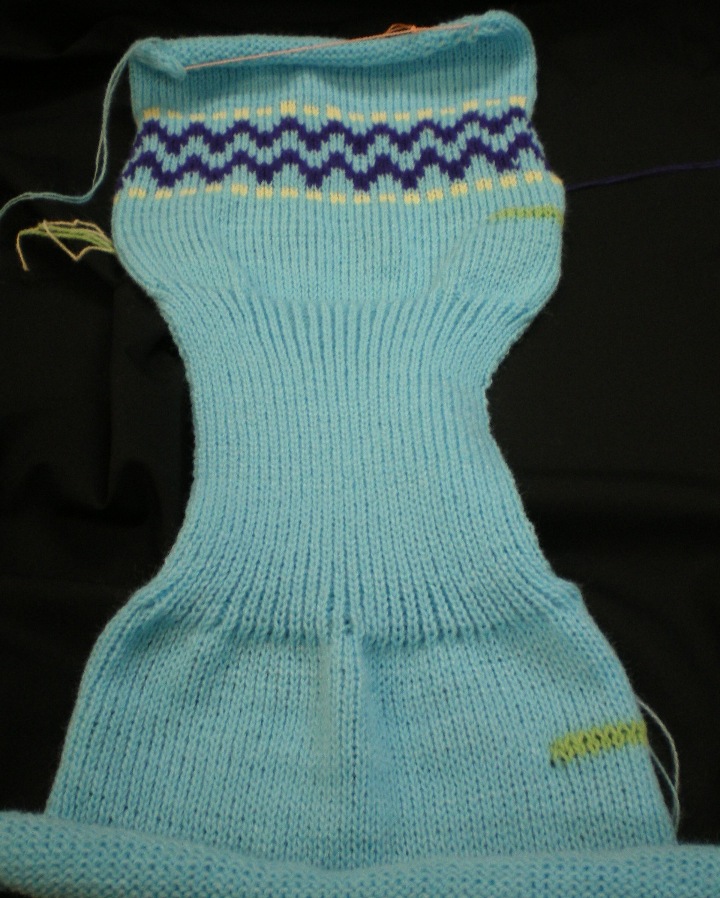
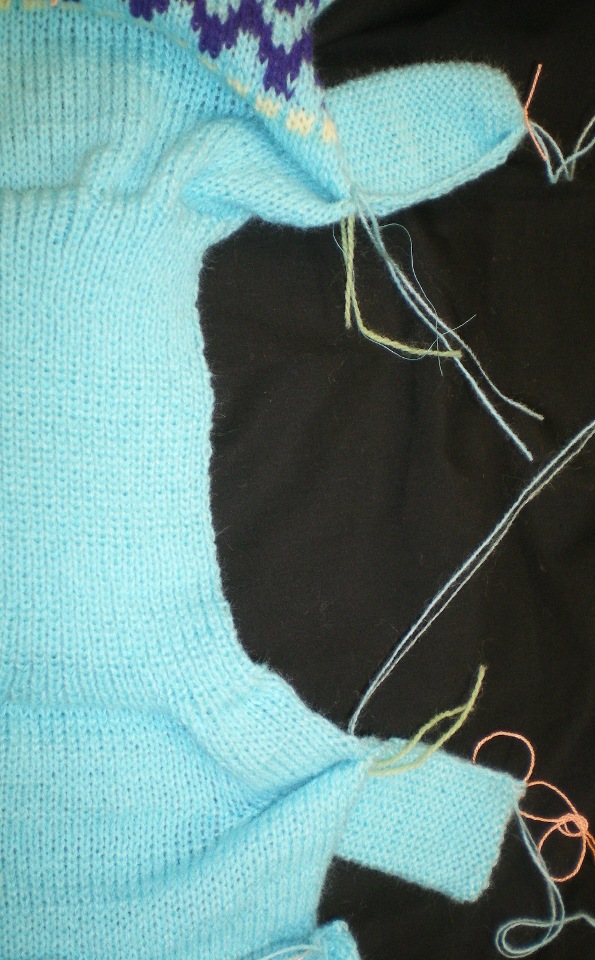
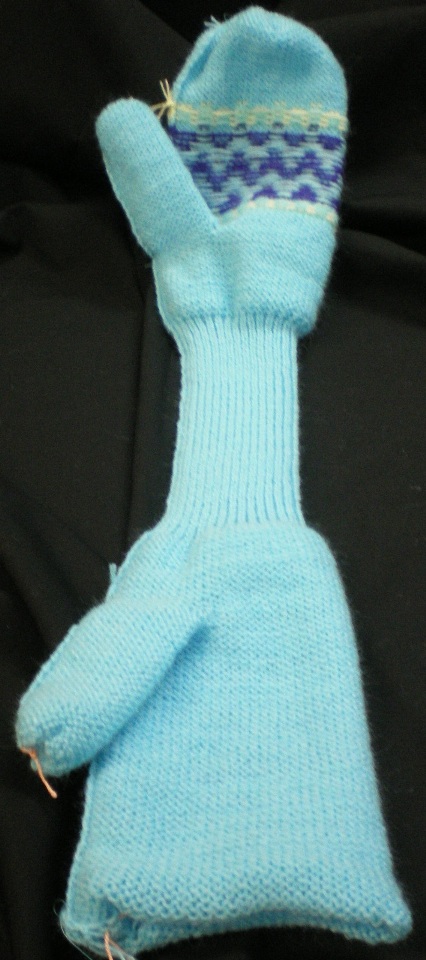
This is what your mitten looks before you add the thumbs |
|
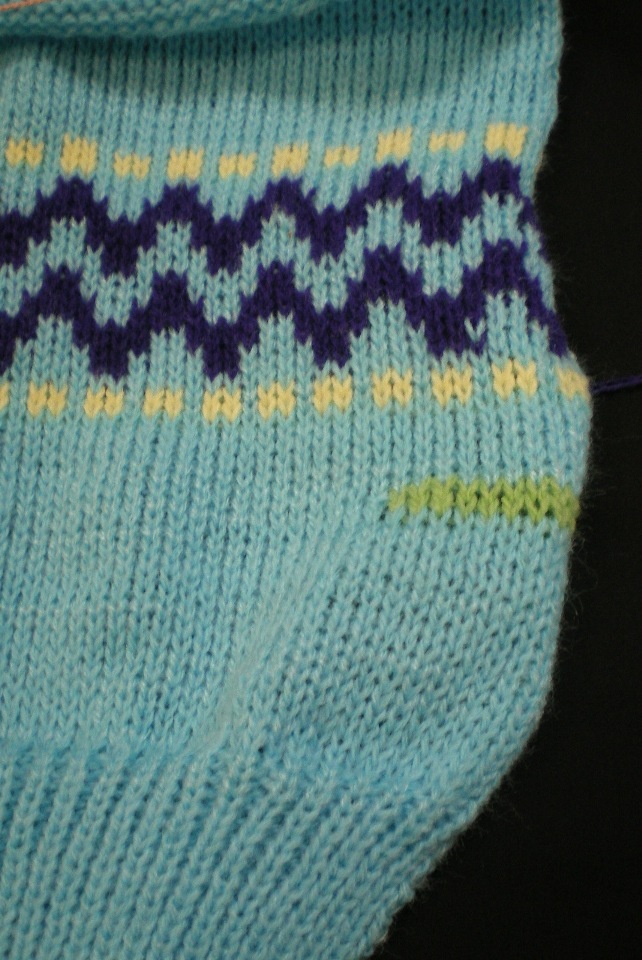
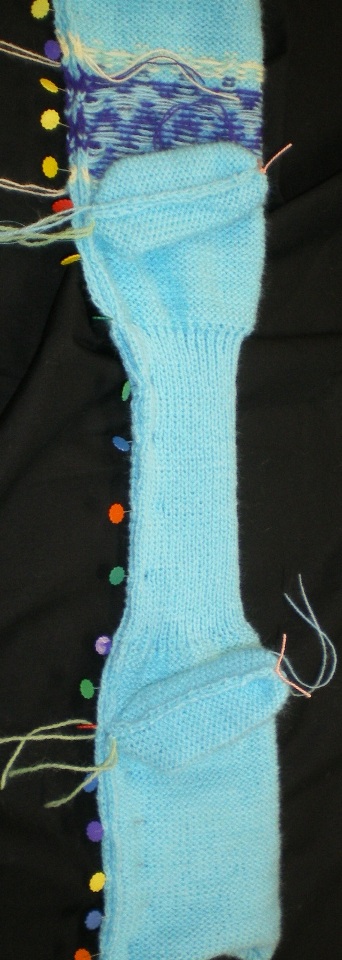
Close up of the two rows of waste yarn where the thumb will be |
|
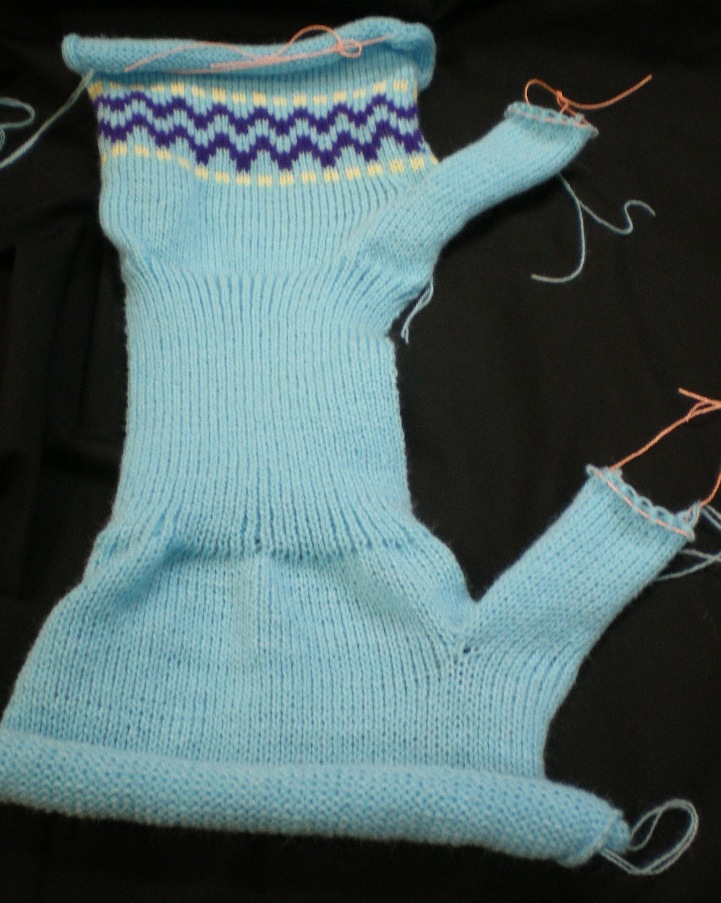
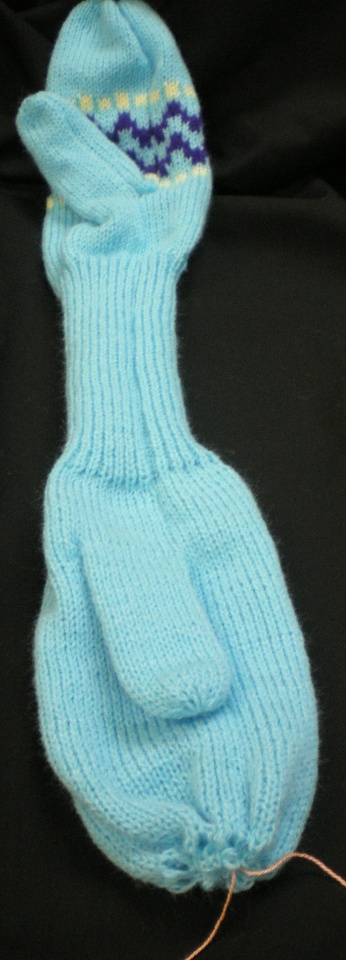
After the thumbs have been knitted |
|
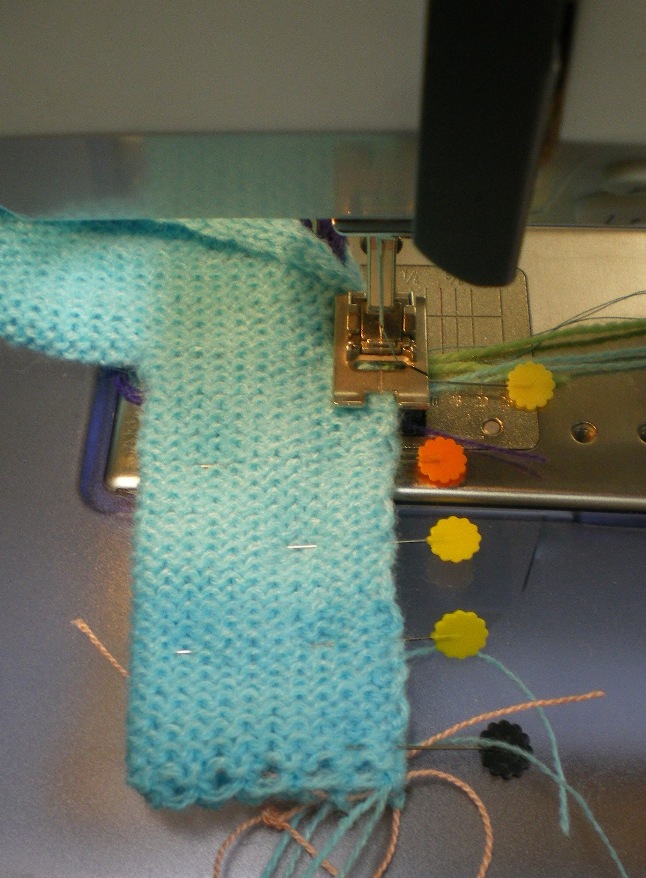
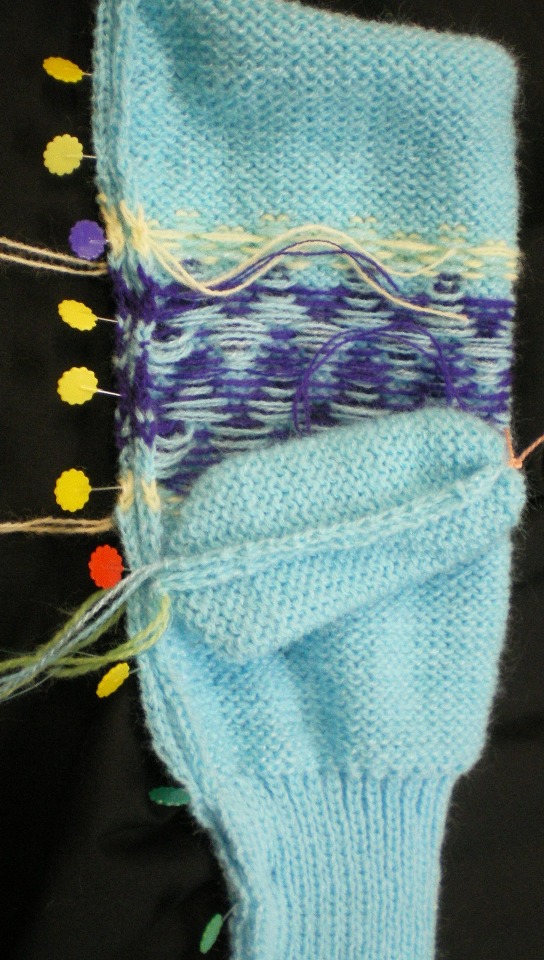
Match up waste yarn (that's the green yarn you see there) and the cast on yarn for the thumb (next to it), and then pin all the thumb ready to sew. |
|
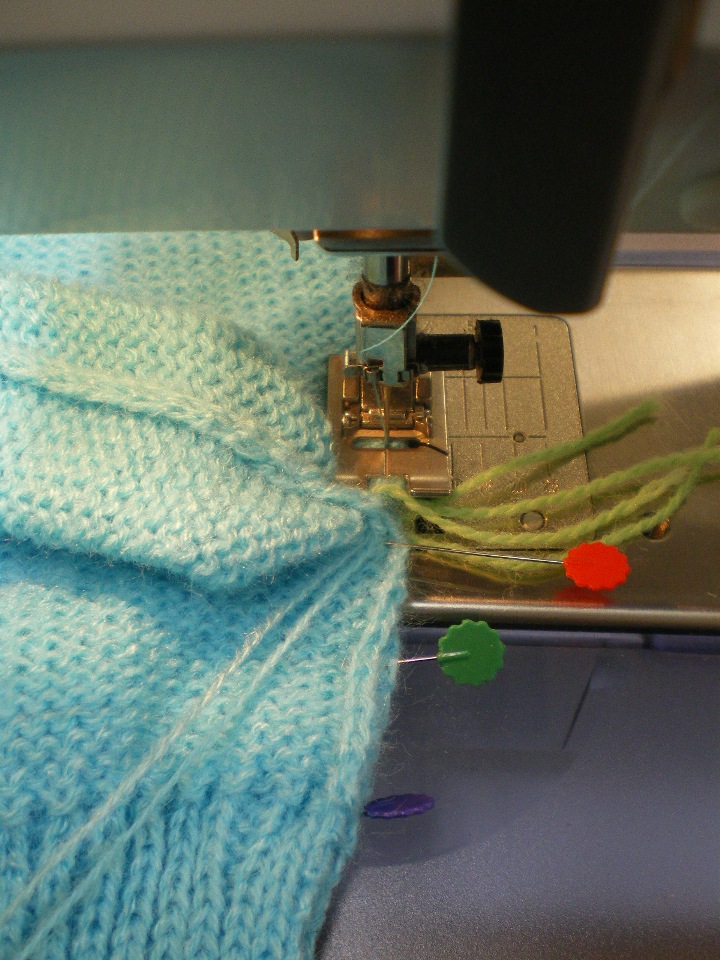
Start at the base of thumb, do a little back stitch, sew to the end avoiding catching in the crochet cord, do another little back stitch. I usually run my finger under the edges of the seam now and then as I sew in order to bring the bottom edge out to match the top edge. Check that both edges have been caught. |
|
Once the thumb seams are done, tie the crochet cord tight at the top of the thumbs, (I just did one in the photo to show you) and then cut off the excess (not too close though). Don't take your waste yarn out yet - it will help you match up on the next step. |
|
Next bring the right sides together so that you can sew the final seam (matching up waste yarn). Fold the thumb down as show in the photo. |
|
Close up of the seam and the thumb |
|
Have the thumb on top when you sew the final seam - I usually pull the waste yarn out at this point and if I need to I use a pin or something handy with a point to make sure the base of the thumb is caught in the stitches. Check seam to make sure you have caught it all. |
|
Here's how my double mitten looks after the seam is done and ends are caught in. I usually double check the seam where the thumb meets the side seam and using the cast on thread from the thumb sew it tight with a few stitches if there is a hole. Also in this photos I have tied the crochet cotton tight at the top of the mitten and trimmed it (not too short). |
|
Turn your double mitten right side out and tie the crochet cotton at the lining end. Leave it two to three inches long and then using a bodkin pull it through to the wrong side. (The lining looks huge in this photo because it is closest to the camera). |
|
Push the lining to the inside and your double mitten is finished. |